Email List Cleaning Protocol: 8-Step Hygiene Checklist to Boost Deliverability 30%
Your email list is quietly killing your deliverability rates. Even the most valuable subscriber list degrades over time, accumulating invalid addresses, inactive contacts, and engagement-draining dead weight. If you’re wondering why your open rates keep dropping despite creating better content, the answer isn’t your subject lines—it’s your list hygiene. Learn more about email deliverability best practices.
Email list cleaning isn’t optional maintenance anymore. With inbox providers like Gmail and Outlook tightening their spam filters and prioritizing engagement metrics, a dirty list will destroy your sender reputation faster than you can say unsubscribe. The good news? A systematic email list cleaning protocol can boost your deliverability by 30% or more, reduce bounce rates dramatically, and get your messages back in front of people who actually want to read them. Learn more about protecting your sender reputation.
This comprehensive guide walks you through an 8-step email list cleaning checklist that marketing automation experts use to maintain pristine lists. Whether you manage 500 subscribers or 50,000, these proven strategies will transform your email marketing performance and protect your most valuable marketing asset. Learn more about implementing an email sunset policy.
Why Email List Cleaning Matters More Than Ever
Email service providers have become incredibly sophisticated at identifying senders who blast messages to disengaged audiences. They’re tracking how recipients interact with your emails, measuring everything from opens and clicks to deletions and spam complaints. When significant portions of your list ignore your messages, ISPs interpret this as a signal that your content is unwanted. Learn more about email reactivation campaigns.
The consequences extend far beyond individual campaign metrics. Poor list hygiene triggers a downward spiral: lower engagement rates damage your sender reputation, which causes more emails to land in spam folders, which further reduces engagement. Before long, even your most loyal subscribers stop seeing your messages because the algorithm has decided you’re not worthy of the inbox. Learn more about email frequency testing.
Beyond deliverability, dirty lists waste money. If you’re paying per contact or per send, why spend budget on addresses that will never convert? Dead contacts inflate your list size without contributing revenue, making your cost-per-acquisition look worse than it actually is and hiding the true performance of your engaged segments.
Regular email list cleaning addresses all these issues simultaneously. You’ll improve deliverability, reduce costs, get more accurate performance data, and protect your sender reputation. The question isn’t whether to clean your list—it’s how often and how thoroughly.
Step 1: Remove Hard Bounces Immediately
Hard bounces are non-negotiable. These are email addresses that permanently failed delivery because the address doesn’t exist, the domain is invalid, or the recipient’s server has completely blocked delivery. Continuing to send to hard bounces is like knocking on a door that’s been bricked over—pointless and damaging.
Most email marketing platforms automatically suppress hard bounces after one failed attempt, but you need to verify this setting is active. Check your platform’s bounce handling configuration and ensure hard bounces are automatically removed from future campaigns. If your platform doesn’t handle this automatically, set up a monthly manual removal process at minimum.
Hard bounces damage your sender reputation faster than almost any other factor. ISPs view high hard bounce rates as a sign of poor list management or potentially sketchy acquisition practices. A bounce rate above 2% raises red flags, while rates above 5% can trigger deliverability problems across your entire sending domain.
Download your hard bounce list quarterly and analyze the sources. Are certain lead magnets or signup forms generating unusually high bounce rates? This indicates problems with your data collection process—perhaps fake submissions, typos during manual entry, or integration errors between your website and email platform. Fix these upstream issues to prevent future contamination.
Step 2: Address Soft Bounces Strategically
Soft bounces are trickier than hard bounces because they indicate temporary delivery problems rather than permanent failures. A recipient’s inbox might be full, their mail server temporarily down, or the message too large for their account. These issues can resolve themselves, so immediate removal isn’t always appropriate.
Implement a three-strike approach for soft bounces. Most platforms track consecutive soft bounces automatically, but verify your settings. After three consecutive soft bounces across separate campaigns, treat the address as a hard bounce and remove it. This gives legitimate addresses time to resolve temporary issues while preventing chronic soft bouncers from dragging down your metrics.
Pay special attention to soft bounces from corporate or educational domains. These addresses often have strict content filters or attachment restrictions that trigger soft bounces for certain message types. If you notice patterns—like soft bounces spiking when you include PDFs or large images—adjust your content strategy rather than removing potentially valid subscribers.
Monitor soft bounce rates after major campaigns. Sudden spikes indicate technical problems with your email template, authentication settings, or sending infrastructure rather than list quality issues. Investigate these technical factors before attributing problems to your subscriber list.
Step 3: Identify and Segment Inactive Subscribers
Inactive subscribers are the silent killers of email deliverability. These contacts remain on your list, never bounce, but consistently ignore your messages. They dilute your engagement metrics and signal to ISPs that your content isn’t relevant or wanted. Identifying inactive subscribers requires defining what inactive means for your specific business.
For most businesses, a subscriber who hasn’t opened or clicked any email in 90-180 days qualifies as inactive. Adjust this timeframe based on your sending frequency—if you email daily, 90 days is reasonable; if you send monthly, extend to 180 days. The key is establishing a consistent definition you apply uniformly across your list.
Create engagement-based segments in your email platform. Build lists for highly engaged subscribers (opened within 30 days), moderately engaged (30-90 days), at-risk (90-180 days), and inactive (180+ days). This segmentation reveals the true health of your list and allows targeted re-engagement strategies before deletion.
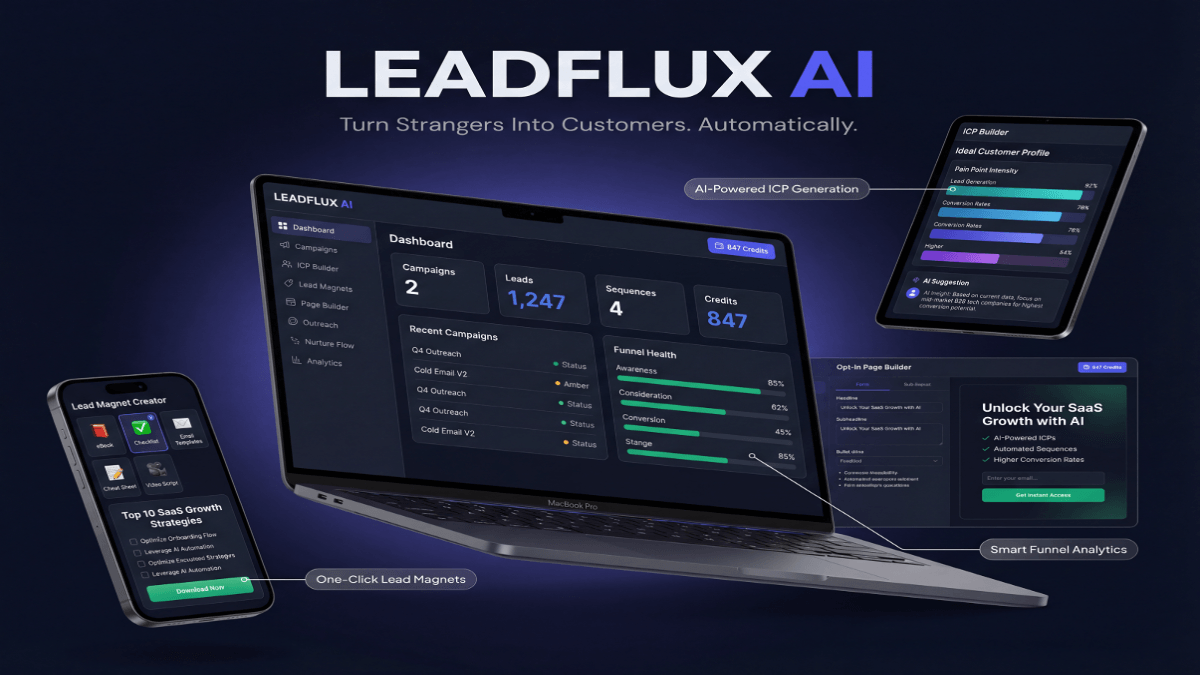
Stop Guessing. Start Converting.
LeadFlux AI Does the Heavy Lifting.
Tracking KPIs is only half the battle — you need a system that turns data into revenue. LeadFlux AI automatically identifies your highest-value prospects, scores leads in real time, and delivers conversion-ready pipelines so you can focus on closing deals, not chasing dead ends.
See How LeadFlux AI WorksReview these segments monthly and track trends. Is your inactive segment growing faster than your engaged segment? This signals problems with content relevance, sending frequency, or audience targeting. Use these insights to refine your strategy before inactivity becomes entrenched across your entire list.
Step 4: Launch Re-engagement Campaigns Before Removal
Before removing inactive subscribers, give them one final chance to re-engage. A well-crafted re-engagement campaign can recover 5-15% of inactive contacts, bringing valuable subscribers back from the brink. More importantly, it demonstrates to ISPs that you’re making good faith efforts to send only to interested recipients.
Design your re-engagement campaign to stand out from regular content. Use subject lines that directly acknowledge the lack of engagement, like “Are we still a good fit?” or “Last chance before we say goodbye.” Make the email personal, brief, and focused on a single action—confirming they want to stay subscribed.
Include explicit permission options in your re-engagement email. Ask subscribers to click a button or link confirming they want to remain on your list. This click serves as fresh engagement data for ISPs and reconfirms genuine interest. Alternatively, offer preference center options where subscribers can adjust frequency or topics instead of completely unsubscribing.
Send your re-engagement campaign to inactive segments only—don’t waste it on engaged subscribers. Give recipients 14-21 days to respond, then permanently remove anyone who doesn’t engage. Document this process for compliance purposes, especially if you operate in regions with strict privacy regulations like GDPR.
Step 5: Remove Role-Based and Generic Email Addresses
Role-based email addresses like info@, sales@, support@, or admin@ represent inboxes monitored by multiple people or automated systems rather than individual subscribers. These addresses generate poor engagement, often trigger spam filters, and provide zero personalization opportunities. They don’t belong on a quality email list.
Export your subscriber list and filter for common role-based prefixes. Most email verification tools can automatically flag role-based addresses, but manual review catches edge cases. Look for patterns like team@, contact@, marketing@, or department names. These addresses rarely convert and frequently complain about receiving marketing emails they never personally requested.
Generic addresses present similar problems. Email addresses with patterns like test@, example@, or obvious fakes like mickey.mouse@ indicate low-quality signups or bot submissions. These contacts waste resources and skew your analytics without providing value. Filter them out during regular cleaning cycles.
Implement validation at the point of capture to prevent role-based addresses from entering your list. Configure your signup forms to reject common role-based prefixes or use real-time email verification APIs that flag suspicious addresses before they’re added. Prevention is far more efficient than cleanup after the fact.
Step 6: Validate Email Syntax and Domain Health
Email addresses on your list should follow proper syntax rules and connect to valid, active domains. Addresses with typos, formatting errors, or domains that no longer exist will never successfully receive your messages. These technical problems are surprisingly common, especially on older lists or those built through manual data entry.
Use email verification services to check address validity at scale. Tools like NeverBounce, ZeroBounce, or BriteVerify analyze each address without sending actual emails, checking syntax correctness, domain validity, and mailbox existence. These services typically charge per verification but return immediate, actionable data about list quality.
Pay attention to common typo patterns in domain names. Gmail addresses mistyped as gmial.com or gmai.com, Yahoo as yahooo.com, or Outlook as outloook.com are easily fixable errors that preserve legitimate subscribers. Some verification tools automatically suggest corrections for common mistakes, allowing you to update addresses rather than delete them.
Schedule comprehensive validation quarterly for your entire list and validate new signups in real-time. Real-time validation at signup catches errors immediately when subscribers can easily resubmit with the correct address. This prevents invalid addresses from ever contaminating your database while improving user experience by catching typos before form submission.
| List Health Metric | Healthy Range | Warning Zone | Critical Action Required |
|---|---|---|---|
| Hard Bounce Rate | Below 0.5% | 0.5% – 2% | Above 2% |
| Soft Bounce Rate | Below 1% | 1% – 3% | Above 3% |
| Open Rate | Above 20% | 15% – 20% | Below 15% |
| Spam Complaint Rate | Below 0.1% | 0.1% – 0.3% | Above 0.3% |
| Inactive Subscribers | Below 20% | 20% – 40% | Above 40% |
The data above represents averages — your results will vary based on implementation quality and consistency.
Step 7: Monitor and Remove Spam Complaints
Spam complaints are the nuclear option of list hygiene problems. When a subscriber marks your email as spam, they’re telling ISPs in the strongest possible terms that they don’t want your messages. ISPs take these signals extremely seriously, and high complaint rates will destroy your sender reputation faster than any other metric.
Establish feedback loops with major ISPs to receive spam complaint notifications. Gmail, Yahoo, Outlook, and other providers offer feedback loop programs that alert you when subscribers mark your messages as spam. Configure these loops through your email service provider or directly with ISPs if you send through your own infrastructure.
Immediately and permanently remove anyone who files a spam complaint. Don’t attempt re-engagement, don’t question their decision, and don’t wait for a second complaint. One complaint is enough to require removal. Configure your platform to automatically suppress complainers from all future sends to avoid accidentally contacting them again.
Analyze complaint patterns to identify root causes. Are complaints concentrated among recent signups, suggesting problems with your acquisition process? Do they spike after certain types of content or increased sending frequency? Use complaint data as feedback about subscriber expectations and adjust your strategy to prevent future complaints rather than just cleaning up after them.
Step 8: Implement Ongoing Monitoring and Maintenance Schedules
Email list cleaning isn’t a one-time project—it’s an ongoing discipline that requires consistent attention. Lists degrade continuously as people change jobs, abandon email accounts, and lose interest in your content. Without regular maintenance, your freshly cleaned list will return to its previous degraded state within months.
Establish a maintenance calendar that matches your list size and growth rate. Small lists under 5,000 subscribers benefit from quarterly deep cleans. Medium lists between 5,000-50,000 need monthly attention. Large lists over 50,000 require weekly monitoring of key metrics with monthly cleaning cycles. Adjust these frequencies based on your sending volume and engagement trends.
Create automated workflows that continuously handle basic hygiene tasks. Configure your platform to automatically suppress hard bounces, track consecutive soft bounces, and flag addresses that haven’t engaged in your defined inactive period. Automation ensures consistent handling without requiring manual intervention for every issue.
Document your email list cleaning protocol in a standard operating procedure. Include specific definitions for inactive subscribers, bounce handling rules, re-engagement campaign triggers, and removal criteria. This documentation ensures consistency when multiple team members manage your email program and provides compliance evidence if regulations require demonstrating list management practices.
Build reporting dashboards that surface list health metrics at a glance. Track total list size, engagement rates by segment, bounce rates, complaint rates, and percentage of subscribers in each activity level. Review these dashboards weekly to spot trends before they become problems and adjust your cleaning schedule based on actual performance data.
Measuring the Impact of Email List Cleaning
The benefits of systematic email list cleaning extend across every email marketing metric you track. Most businesses see immediate improvements in open rates, often jumping 20-40% after removing inactive segments. Click-through rates typically improve even more dramatically since you’re measuring engagement among people who actually open messages.
Deliverability improvements take slightly longer to materialize but prove more valuable long-term. As ISPs observe consistent engagement from your cleaned list, your sender reputation improves. This improved reputation means more messages land in primary inboxes rather than promotions tabs or spam folders, creating a virtuous cycle of better placement and better engagement.
Cost savings depend on your email platform’s pricing structure. If you pay based on contact count, removing inactive subscribers directly reduces monthly costs. If you pay per send, cleaned lists reduce waste by eliminating sends to addresses that will never convert. Calculate your cost per engaged subscriber before and after cleaning to quantify financial impact.
Beyond metrics, cleaned lists improve strategic decision-making. When your data reflects genuine engagement from real people rather than noise from inactive accounts, you can trust your analytics. Segmentation becomes more meaningful, A/B tests produce clearer winners, and campaign performance data actually indicates what’s working rather than just measuring how many dead addresses remain on your list.
Common Email List Cleaning Mistakes to Avoid
The biggest mistake is waiting too long to start cleaning. Many marketers convince themselves that list size matters more than list quality, holding onto every address regardless of engagement. This approach maximizes vanity metrics while minimizing actual business results. Start cleaning now, even if your list feels small—quality always trumps quantity in email marketing.
Removing engaged subscribers through overly aggressive cleaning causes the opposite problem. Before deleting any segment, verify they truly meet your inactive criteria. Check for recent website visits, purchases, or other engagement signals beyond email opens. Some high-value customers rarely open marketing emails but regularly buy—these contacts deserve different treatment than genuinely inactive subscribers.
Failing to segment before cleaning wastes opportunities to recover valuable subscribers. Blast removal of everyone who hasn’t opened in 90 days treats loyal customers the same as one-time freebie seekers. Segment by customer value, purchase history, or signup source, then apply different re-engagement strategies and timeframes to each group based on their potential value.
Neglecting to fix upstream problems means your list will quickly degrade again after cleaning. If your signup forms allow fake addresses, your lead magnets attract freebie-seekers with no purchase intent, or your content fails to deliver promised value, cleaning treats symptoms rather than causes. Investigate why people become inactive and address those root issues alongside regular maintenance.
Take Action: Your Email List Cleaning Roadmap
Start your email list cleaning protocol today by exporting your subscriber list and calculating current health metrics. Measure your hard bounce rate, soft bounce rate, percentage of subscribers who haven’t engaged in 90+ days, and spam complaint rate. These baseline measurements will prove the impact of your cleaning efforts and help you track progress over time.
Schedule your first cleaning session within the next week. Begin with the easiest, highest-impact step—removing hard bounces and obvious invalid addresses. This quick win improves deliverability immediately while building momentum for deeper cleaning work. Then systematically work through each remaining step on your established maintenance schedule.
Remember that email list cleaning serves your subscribers as much as your business. People genuinely want to receive relevant messages from companies they care about. By removing inactive contacts and focusing on engaged subscribers, you’re respecting everyone’s inbox and delivering better experiences to people who value your content. That’s not just good marketing—it’s good business.
For more insights on optimizing your email marketing strategy, explore our guides on email segmentation best practices and creating high-converting email campaigns. External resources: Learn about email authentication protocols from M3AAWG and study deliverability guidelines from Return Path’s Email Intelligence Reports.